Please help I have a 1975 Yamaha Rd 350 with port work,expansion chaimbers,2 into 1 with K&n filter what is the best air fuel mixture setting,pilot jet size,main jet size this bike should have please help me fellas
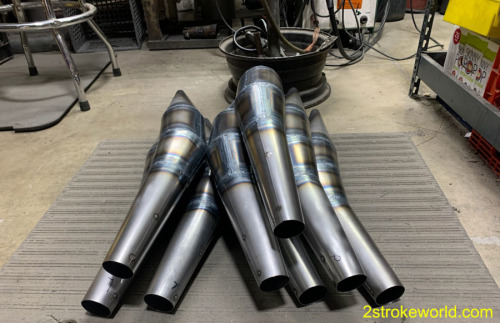
Gary Shumake sent me theses pictures recently (November 2023). These are the F1’s, his best and most expensive RD pipes. Pricing in 2023 is approximately $1,000 plus shipping. Gary takes awhile to get the work done, I’ve been waiting close to one year.
Here are the main bodies. Note these are cones being welded together. Many of his older pipes were hydro-formed.
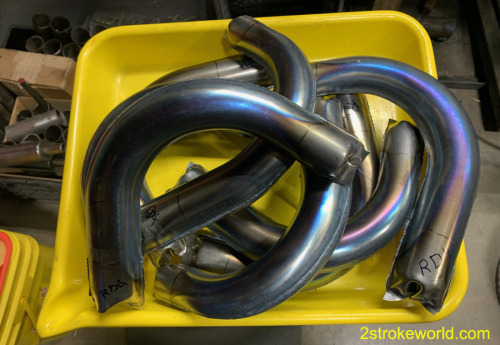
Here are the headpipes.
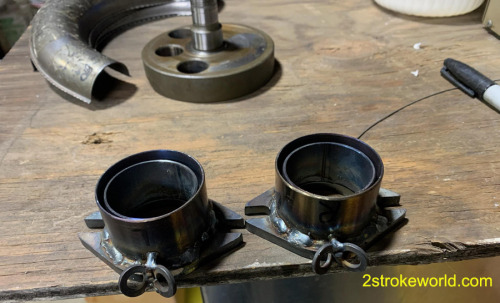
Exhaust flanges.
If you want to contact Gary for expansion chambers and other work, his e-mail is: speciiis@verizon.net
Kawasaki fluttering speedo and tach needles
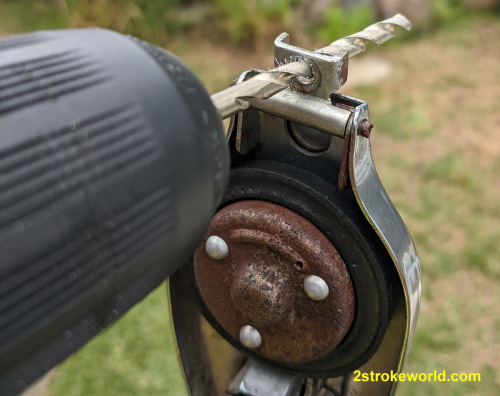
Are your speedometer and tachometer needles waving back and forth when you’re out riding? In other words, are the needles unsteady? If that’s the case, here’s a tip I received from Don Fulsang, an expert in restoring Kawasaki Triples gauges.
ALT
This part where the cable attaches is called the Mandrel. The screwdriver and the yellow arrow point to the part that gets spun by the cable. The outer part of the mandrel is stationary. These parts were pre-lubricated at the factory about 40-50 years ago. The lubricant might be all gone.
I use the screwdriver pictured to apply one or two drops of oil on the gauge, getting the oil into that area. The gauge should be removed from the bike and be held upside down to get the oil into the space. Don’t overdo it or the oil might run through the gauge, maybe messing up the gauge face and/or getting oil on the glass.
If you want to have your Kawasaki Triple gauges restored, contact Don Fulsang, here’s his info.
Phone: (407) 323-3597 8-8 EST
Email: bikenut7172@aol.com
Your gauges will look new or pretty close and Don’s prices are reasonable.
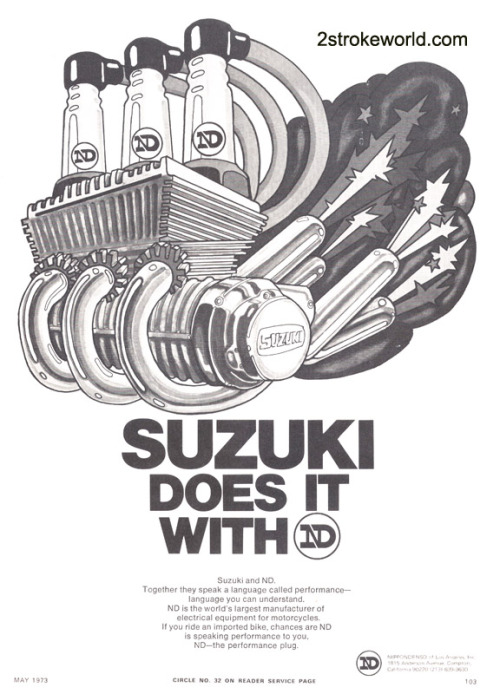
Vintage Nippondenso Spark Plug ad
This ad is from Cycle magazine, May 1973. The picture shows a Suzuki 2 stroke triple with the cooling shroud. It’s either a GT380 or a GT550. Note there are three cylinders and four exhaust pipes. All three of the Suzuki triples (GT380, GT550 and GT750) shared this trait of splitting the center cylinder’s exhaust between two pipes.
NGK B8HS Spark Plugs out of production
NGK’s B8HS spark plug has been the plug of choice for many owners of Yamaha’s RD350′s and Kawasaki KH400′s.
We need to find alternative spark plugs, luckily they are available.
NGK still produces the BR8HS which has a built-in resistor. That plug will work, just check your spark plug caps and if they have resistors, remove them or change to non-resistor spark plug caps.
Another NGK replacement is the B8HS-10 which has a different gap. If you buy these, check the plug gap and make sure it’s appropriate for your motorcycle. The standard spark plug gap for an RD350 is .025″ or approximately .6mm. KH400′s can use the same gap or slightly larger such as .028″ or .7mm as they have CDI ignitions.
Autolite produces the 4092 which is one heat range colder - it should be okay as long as the plugs are kept clean.
Nippondenso makes the W24FS-U spark plug which is perfect except they are hard to find.
Aloha, Mike
RD400 Gas cap lock problems
Yamaha RD400 model years for the USA were 1976-1979. In the year 2022 we are 42-46 years past the golden years when these bikes were first sold.
For many of us that means parts are gathered from various sources to keep our RD’s looking good and in working order. I’ve had several spare gas tanks that didn’t come with a key or the key didn’t match the key for the ignition and seat lock.
Here’s what I have done to overcome those problems.
Gas Tank Lock Removal
I checked the ‘net and found some ideas however they didn’t work specifically for the RD400. Here’s how I removed a locked gas cap.
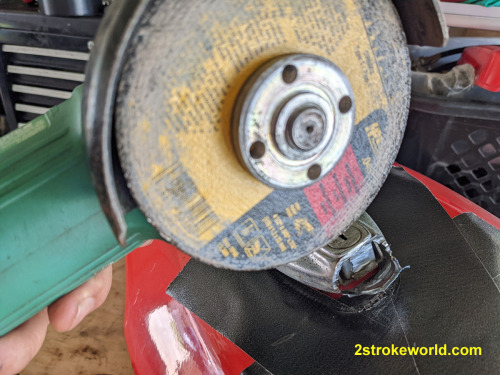
- First I duct taped the gas tank so that it wouldn’t get damaged.
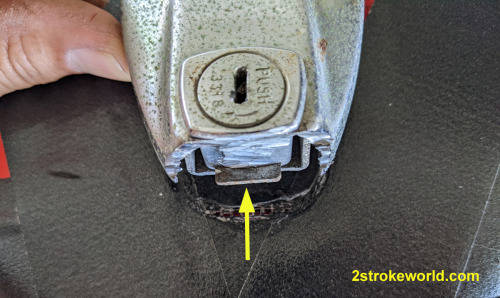
- Second I cut the front of the gas cap off with an angle grinder. That exposed the tab that moves back and forth when the key is turned, releasing the latch.
- With the tab accessible, I carefully pushed the tab with a screwdriver until it released, allowing the tank to open.
Pushing the tab in the direction indicated by the arrow should release the gas cap.
Disable a Gas Tank Lock to work with any RD400 Key
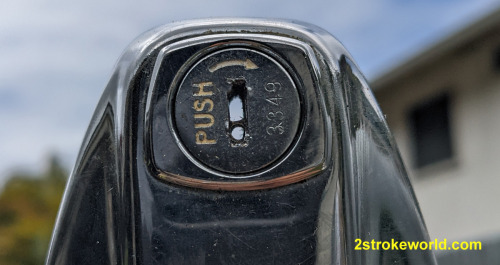
- Drill the guts (tumblers) out of the keyhole. Start with a small drill bit that fits easily in the hole and drill it out so that there are no moving parts blocking when you look at the keyhole. I started from the bottom to try and avoid damaging the top surface of the cap.
Here’s what the keyhole looks like early in the drilling stage. The slot where the key goes should be clear. Keep drilling, patiently.
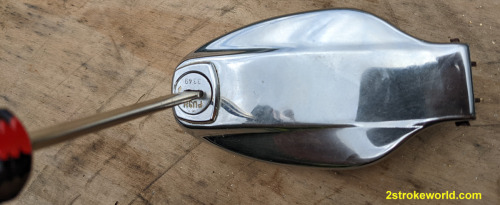
After the tumblers are out, take a screwdriver and work the lock turning clockwise to get it moving. A screwdriver is preferred because using a key and putting all that pressure on it might result in a broken key.
Eventually the lock will move smoothly with a screwdriver and then with a key. Clean the lock thoroughly before installing it on the gas tank so that metal shavings won’t get into the tank and possibly into the engine. I used brake cleaning fluid. Next, I lubricated the latching mechanism with a few drops of motor oil.
With the any RD400 key unlocking the cap, I still had a hard time opening it. The latch wasn’t easily clearing the small pin that it secures to, on the gas tank I drilled the retaining hole slightly oval shaped (up, as shown in this photo). The extra fraction of an inch increased the clearance enough so that the gas cap now pops open when an RD400 key is inserted and turned clockwise.
If you have a nice gas cap on an RD400 tank that you want to save, try drilling the tumblers out with the cap mounted on the tank. When you have the cap open, be sure and clean the tank thoroughly to remove metal shavings that may have fallen inside.
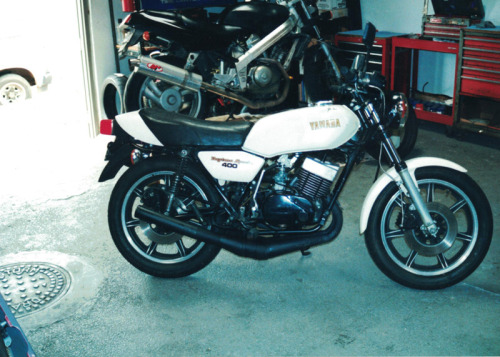
Daytona Special - early 2000′s pic
I spotted this old photo of my Daytona Special on the computer. I’m not sure which shop this was, maybe Sportbike Hawaii or Island Cycle Works. I sold the Daytona around 2005, this photo was prior to the bike having been sold.
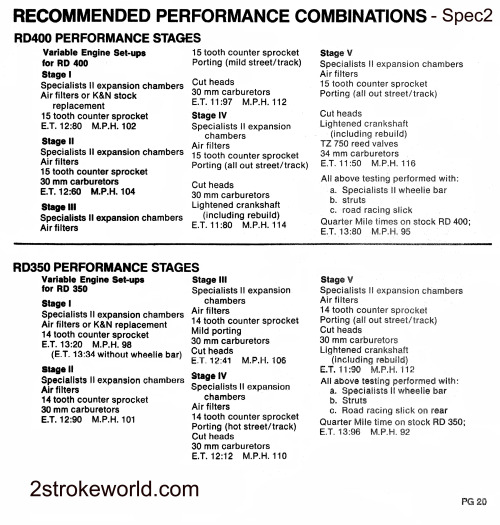
Spec2 Performance Combinations
I found this table in a Spec2 catalog. Recommendations are for Yamaha’s RD400′s and RD350′s.
This information is probably 25-30 years old. Three upgrades that might not have been around back then were head squish band adjustments, electronic ignitions and newer carbs such as the popular Keihin PWK 28′s. Besides those items, the information is still relevant.
Gary Shumake at Spec2 is still in business, despite his website not having been updated from the late 1990′s. He’s busy, not easy to get ahold of and it takes awhile to get your work done with him. However Gary’s work is very good. To get ahold of Gary, his phone number is (747) 257-5129. If he doesn’t answer, leave a message and wait for him to call you back.
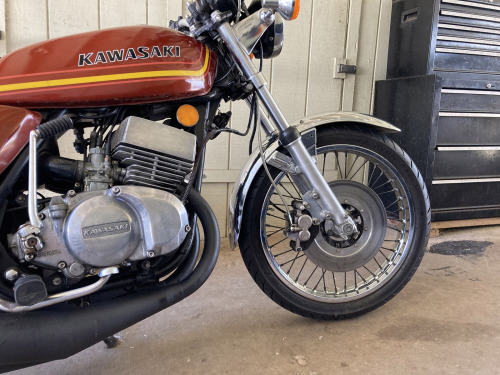
KH400 brake caliper upgrade
The KH400 original brake caliper is acceptable in most conditions. There’s a conversion possible, if you have access to a machinist or if you have this caliper adaptor.
I was lucky enough to buy it from a guy on the Kawasaki Triples forum who went by the username “Mouth.” He might have gotten out of the 2 stroke motorcycle hobby, I haven’t seen him active on the forum in many years.
The steps for conversion are:
1. Make the caliper adaptor or find someone who will do it- here’s the information link at : kawatriple.com 2. Find an EX500 or EX250 or… (this caliper was fitted to many Kawasaki bikes). I have read that the small piston should be leading and I’ve also read that it doesn’t matter. This setup has the small piston leading. 3. Remove the forks and switch them around (left goes to right, etc.) and turn them so that the brake caliper mounts are facing rearward. 4. Remove the dust cover from the right side of the wheel/hub. 5. Unbolt the brake disc and move it from the left side of the hub to the right side. 6. Loosely mount the caliper to the caliper adaptor. You will need two bolts, I believe the size is M10 x 1.25. 7. Bolt the adaptor to the caliper mounts on the fork stanchion. Tighten all four bolts, making sure they don’t contact the disc and make sure the wheel turns freely without excessive pressure from the brake pads. 8. Install new brake lines. The top line is 13 inches, the bottom line is 12 inches total length. Note this set of handlebars is lower than stock. If you’re using the stock or other bars that are higher than mine, you might need a longer top line. 9. Add brake fluid and bleed the system.
I used the stock master cylinder. The brakes work well, more progressive feel and stronger than stock.
Original setup - Before:
After:
The braking power and feel are significantly improved with the caliper adaptor and EX500 caliper. It’s a nice upgrade.
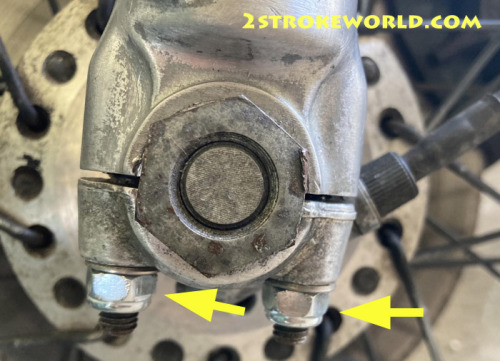
Replace those Fork Nuts
These nuts at the bottom of most forks are usually plain steel with a lockwasher, as supplied by the factory. The nuts might get rusty or lost when I’m working on my forks.
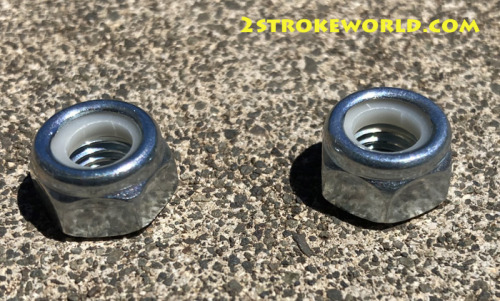
I like to replace the nuts with locknuts having a plastic insert. That helps keep them from loosening up which could be disastrous on a motorcycle ride.
I bought mine at the hardware store. Here’s what they look like from the hardware bin.
The proper size for Kawasaki triples, Yamaha RD’s and Kawasaki KZ’s is M8 x 1.25 pitch. Hardware stores here on Oahu sell them for about 65 cents apiece in steel and $1.25 in stainless steel. Stainless is nice but at almost twice the cost, I usually go for regular steel. If the nuts start rusting years from now I’ll replace them.
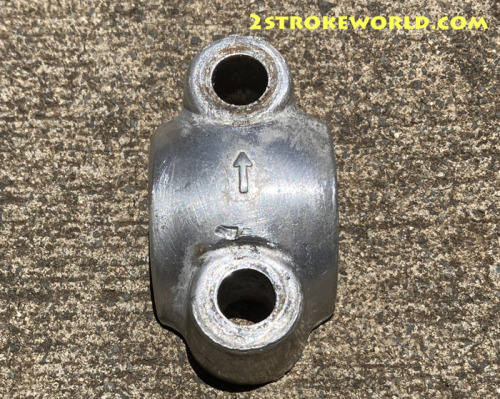
Here’s the bottom cap that the nuts secure, keeping the axle in place. Note the cap has an arrow, meaning that (top side in this photo) should be facing forward when mounted on the motorcycle.